Locating the Disk and preparing for Passthrough
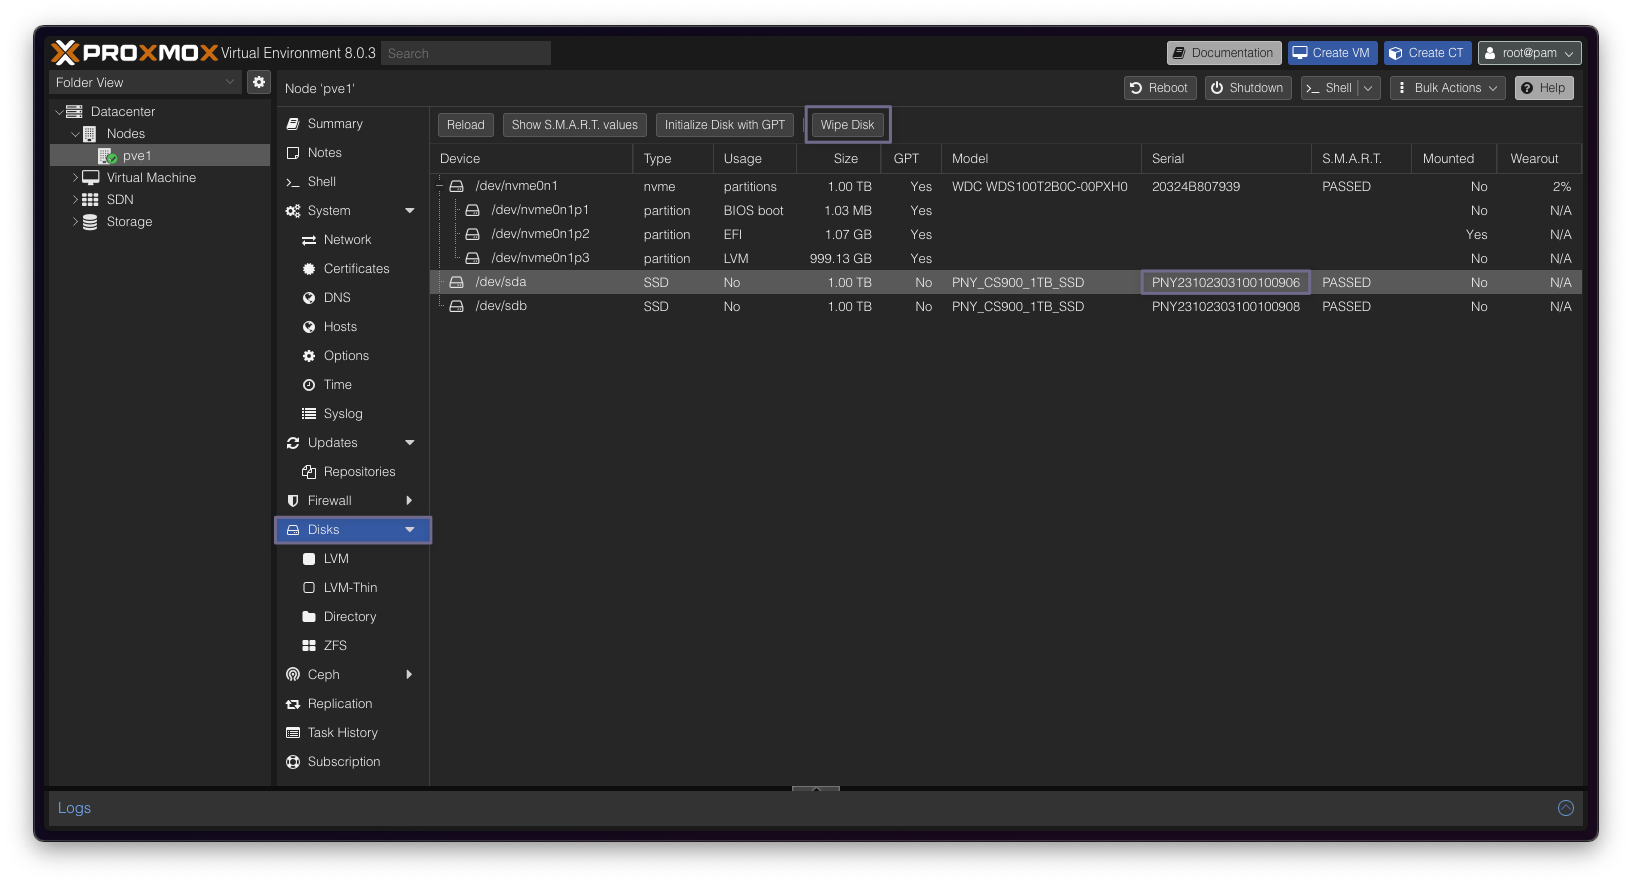
Under the Disks tab, look for the target Disk you’d like to pass over to your VM. Once you’ve located it, take note of the Serial Number of it.
Optional step;Hit Wipe Disk.
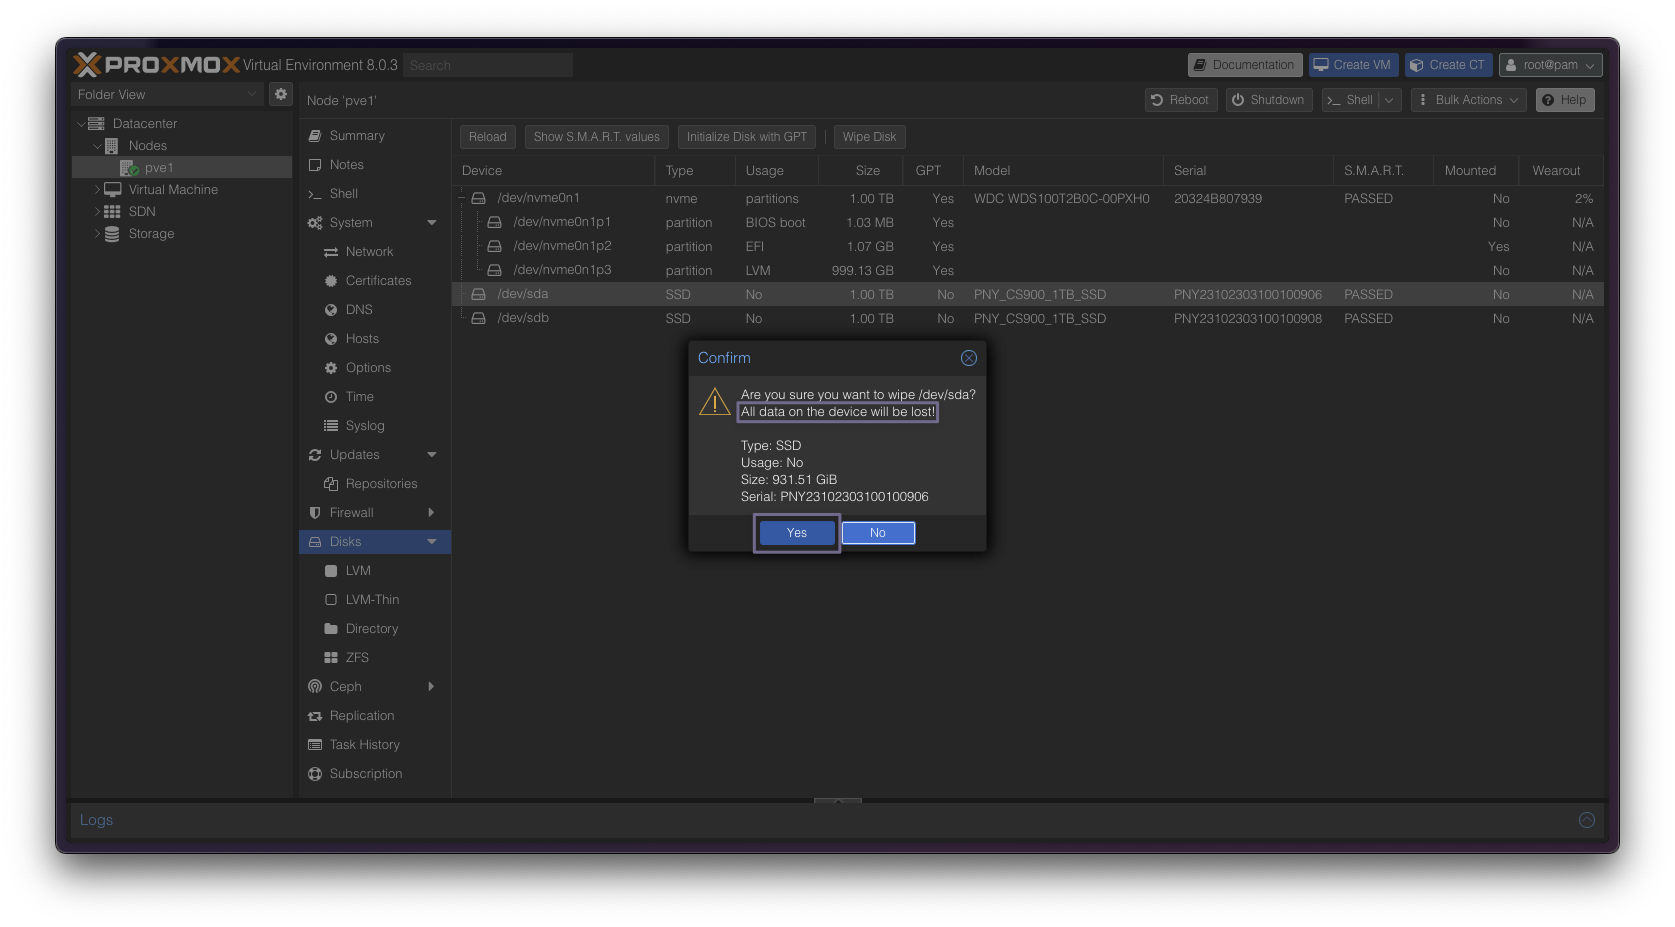
This will delete all contents of the Disk and wipe it completely, so make sure you don’t have anything important left on it!
Hit Yes, and let it do it’s job.
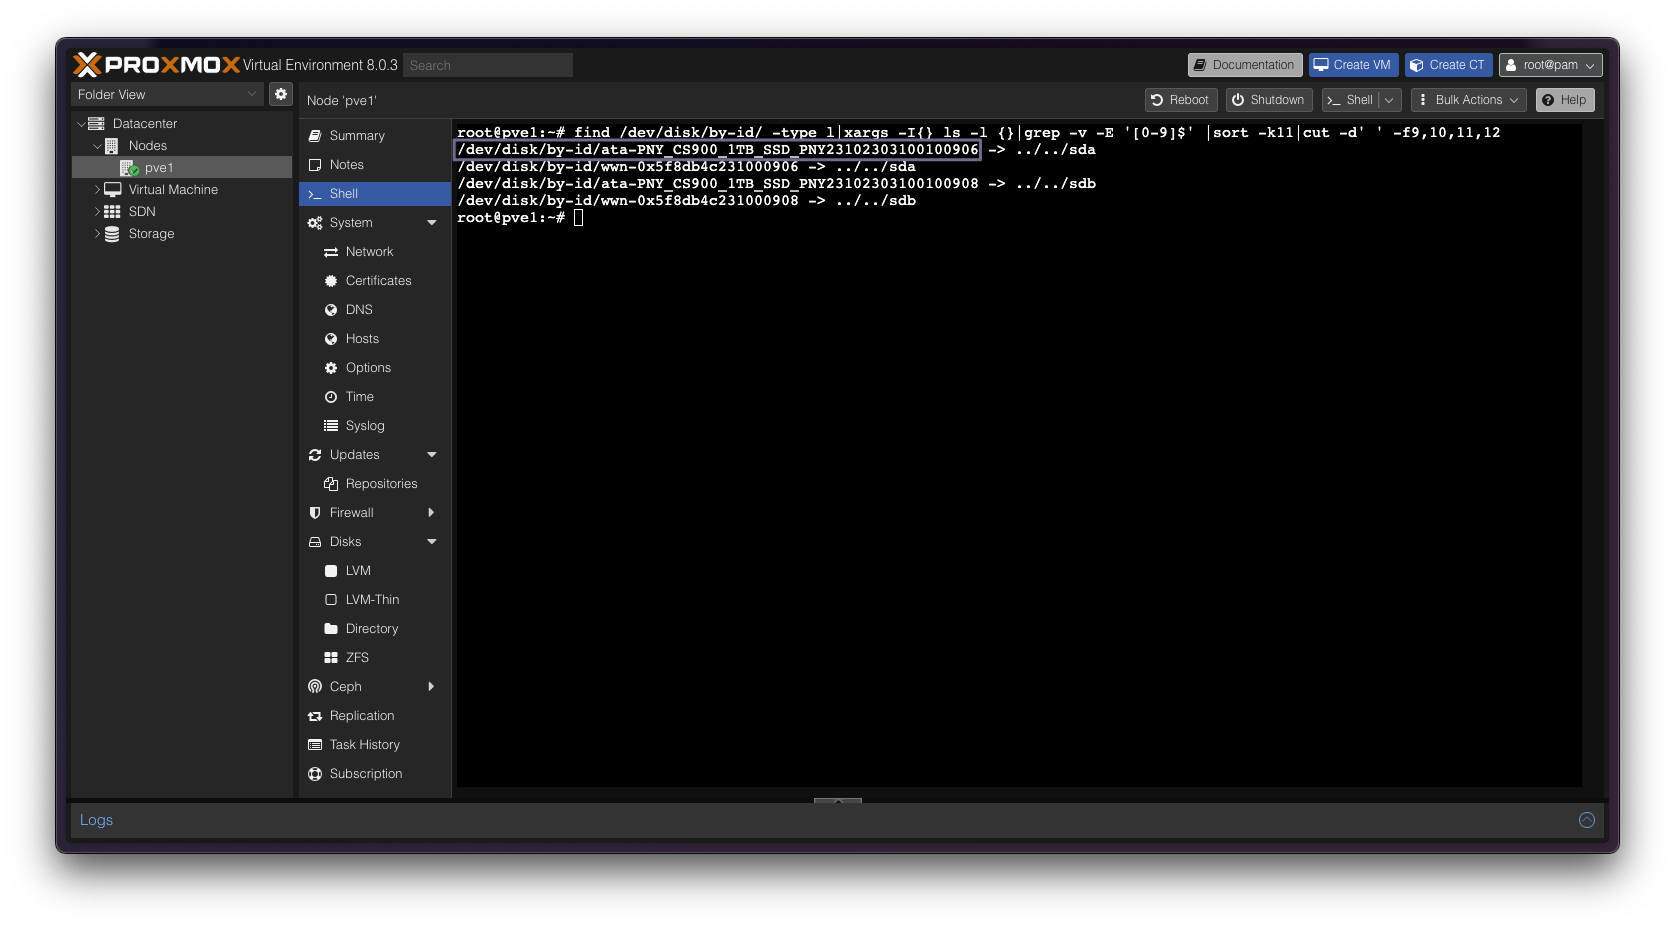
Type the following command
find /dev/disk/by-id/ -type l|xargs -I{} ls -l {}|grep -v -E '[0-9]$' |sort -k11|cut -d' ' -f9,10,11,12It will then show you the complete path of the disk you want.
Copy the path like this and keep it;
/dev/disk/by-id/{disk-serial}
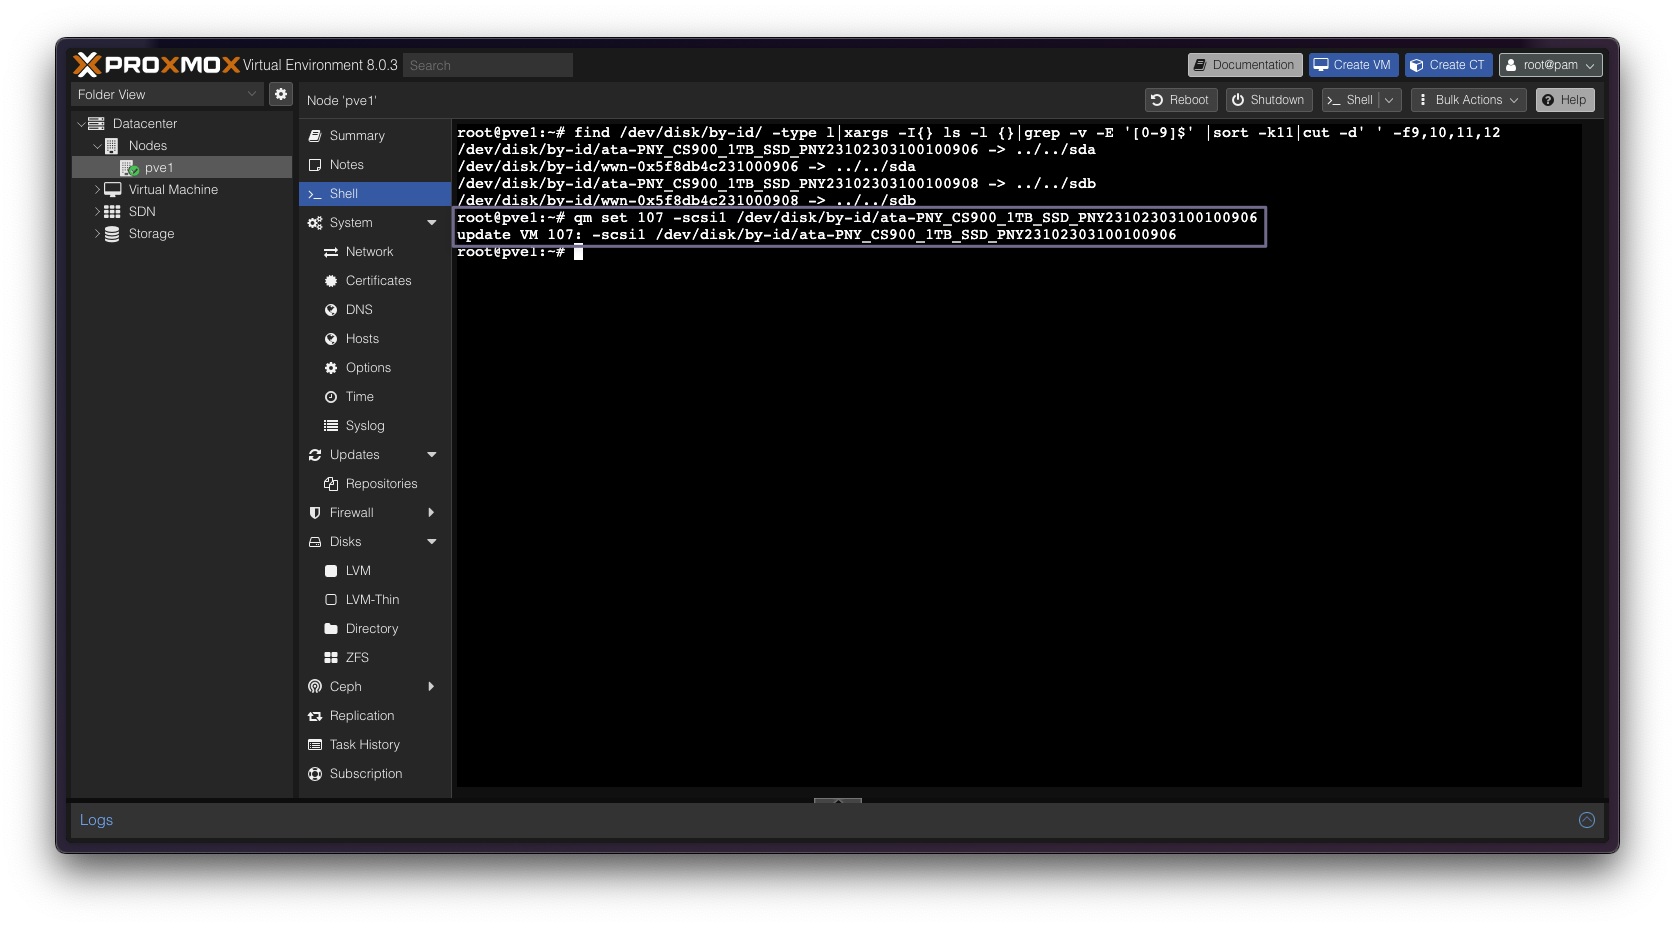
qm set {vmid} -{disk-type}{number} /dev/disk/by-id/{disk-serial}If done correctly, it’ll post a similar output as shown. If not, double check the previous steps.
For Windows and Linux, you’d want; scsi or sata.
For macOS, you’d want; virtio.
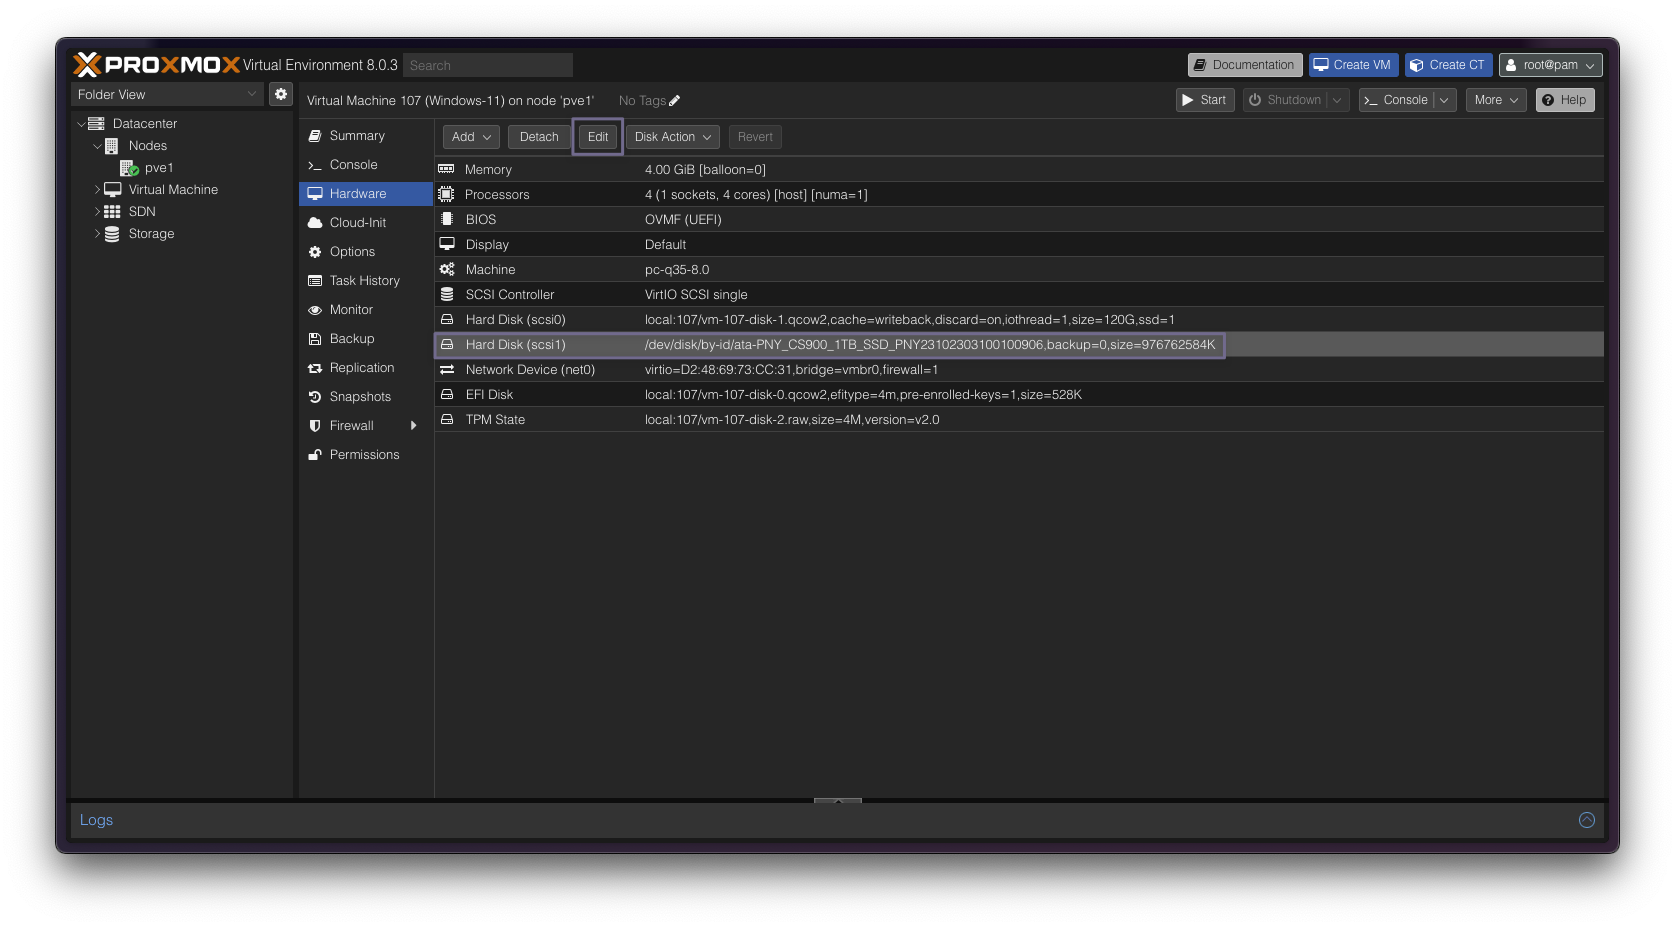
Hit Edit once selected.

For Windows and Linux; as shown.
For macOS; Write back (unsafe).
Once set, boot up your VM.
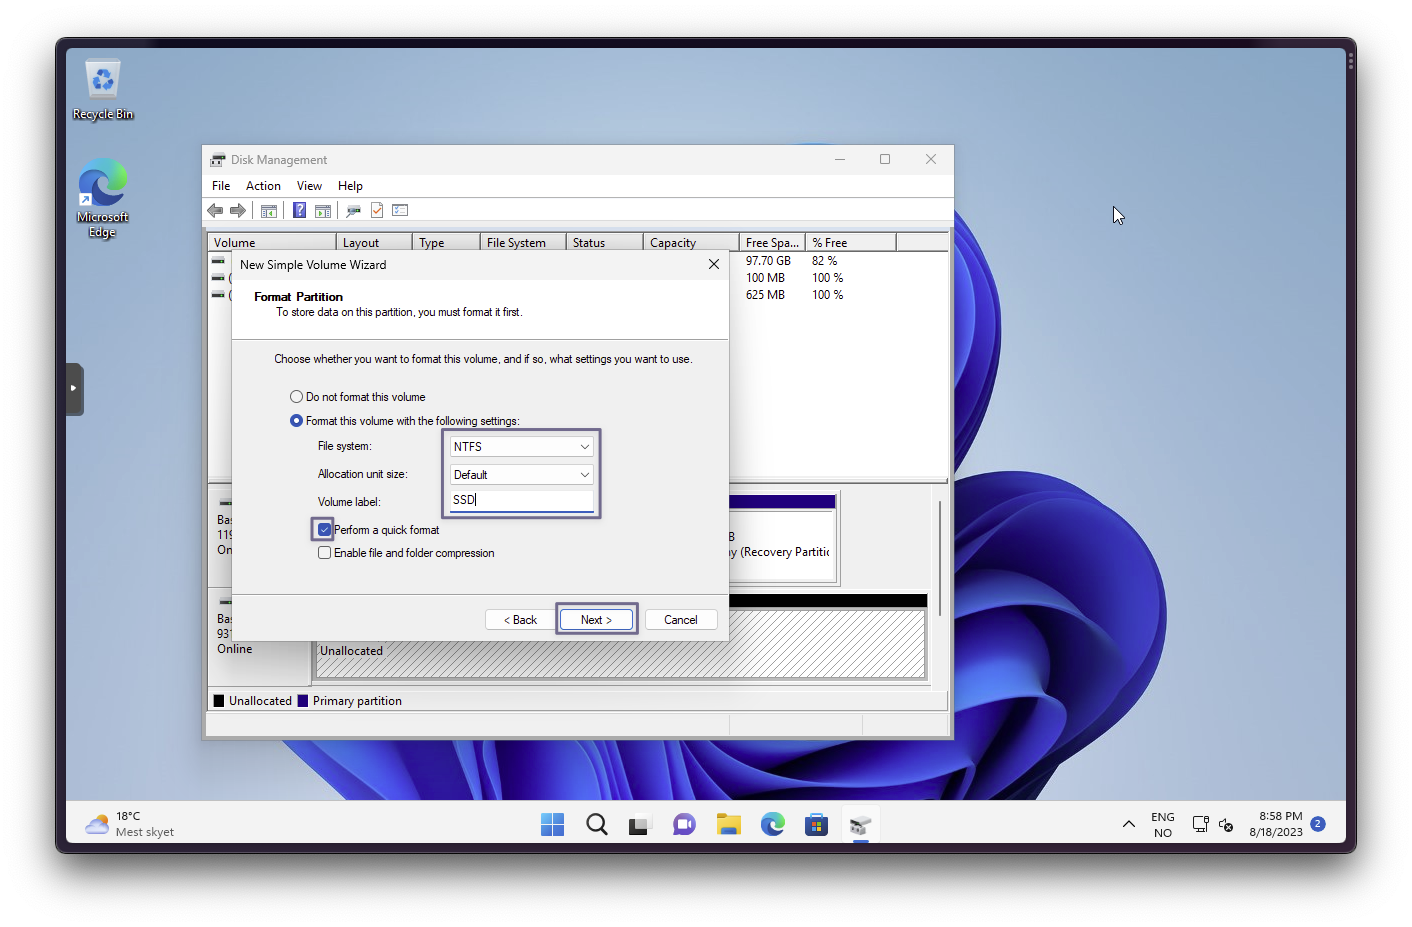
Configuring Disk inside Windows
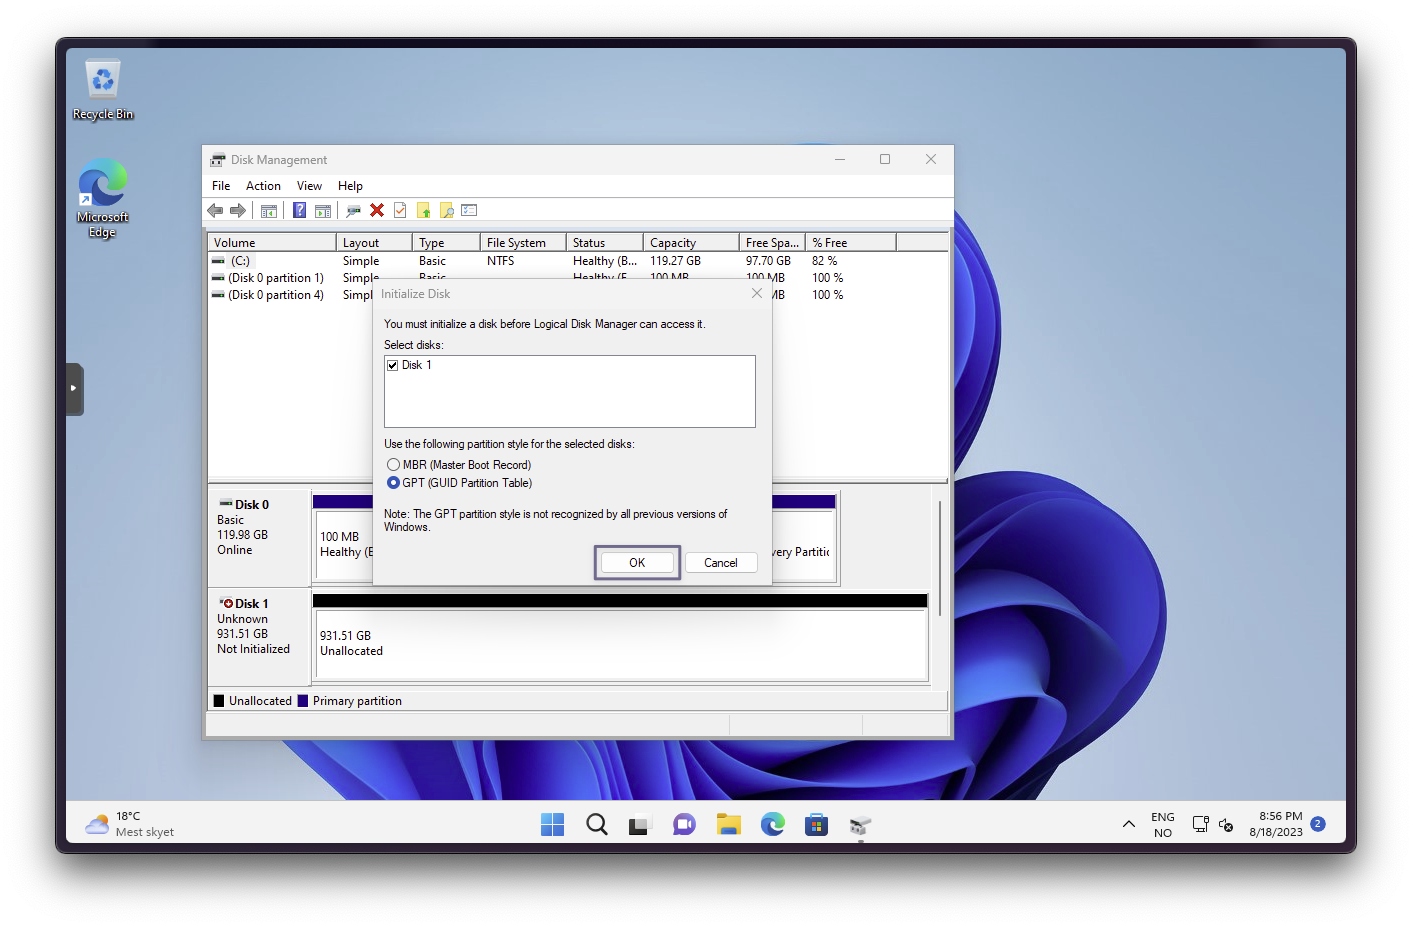
When Windows has booted, open up Disk Management, and this is what you’ll be greeted with.
Hit OK and follow the next steps.
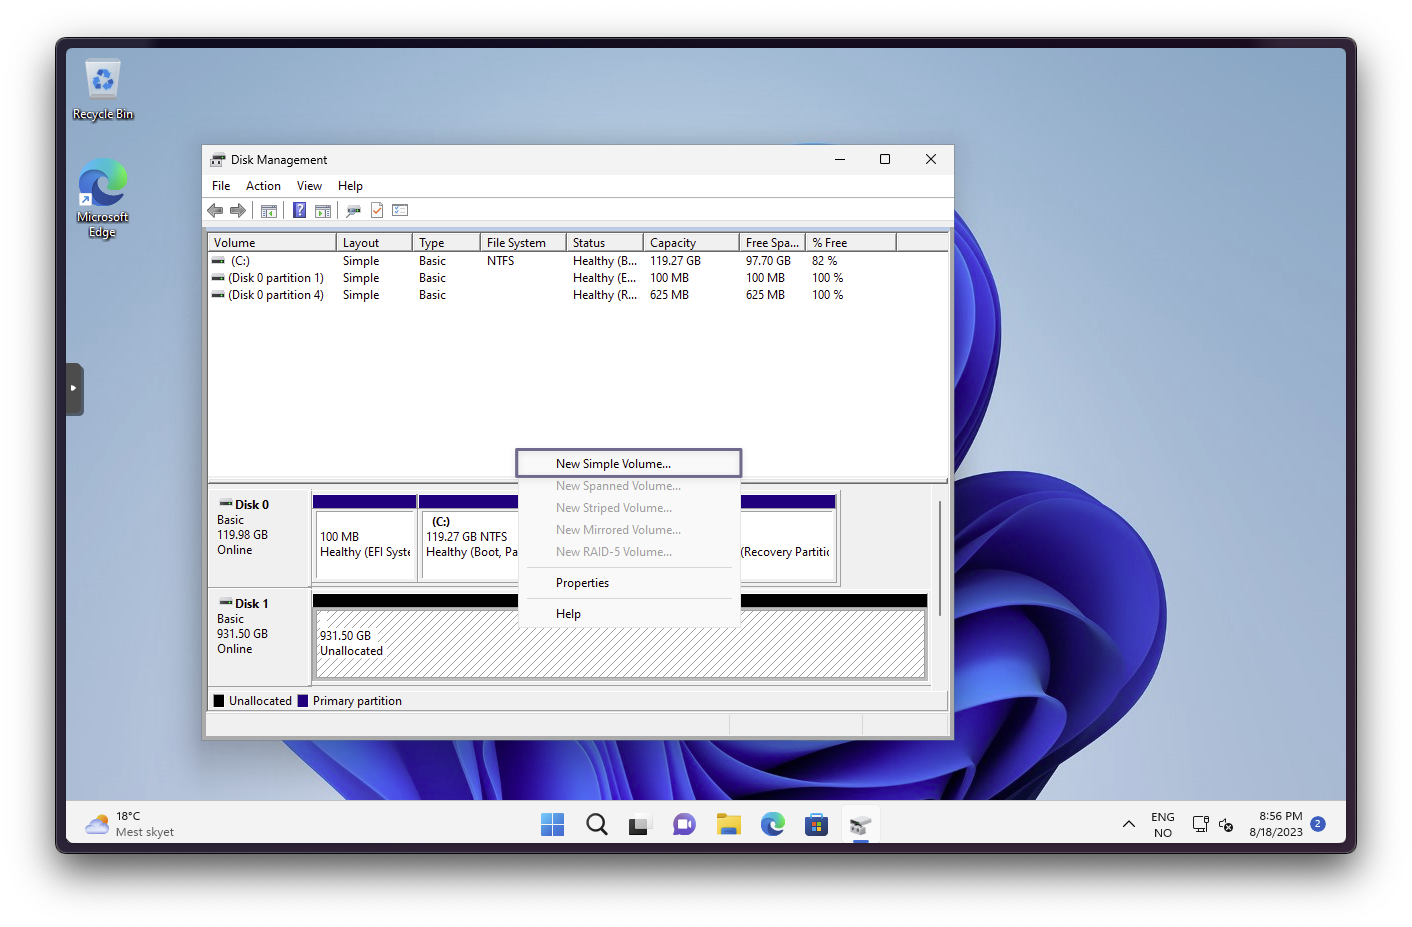


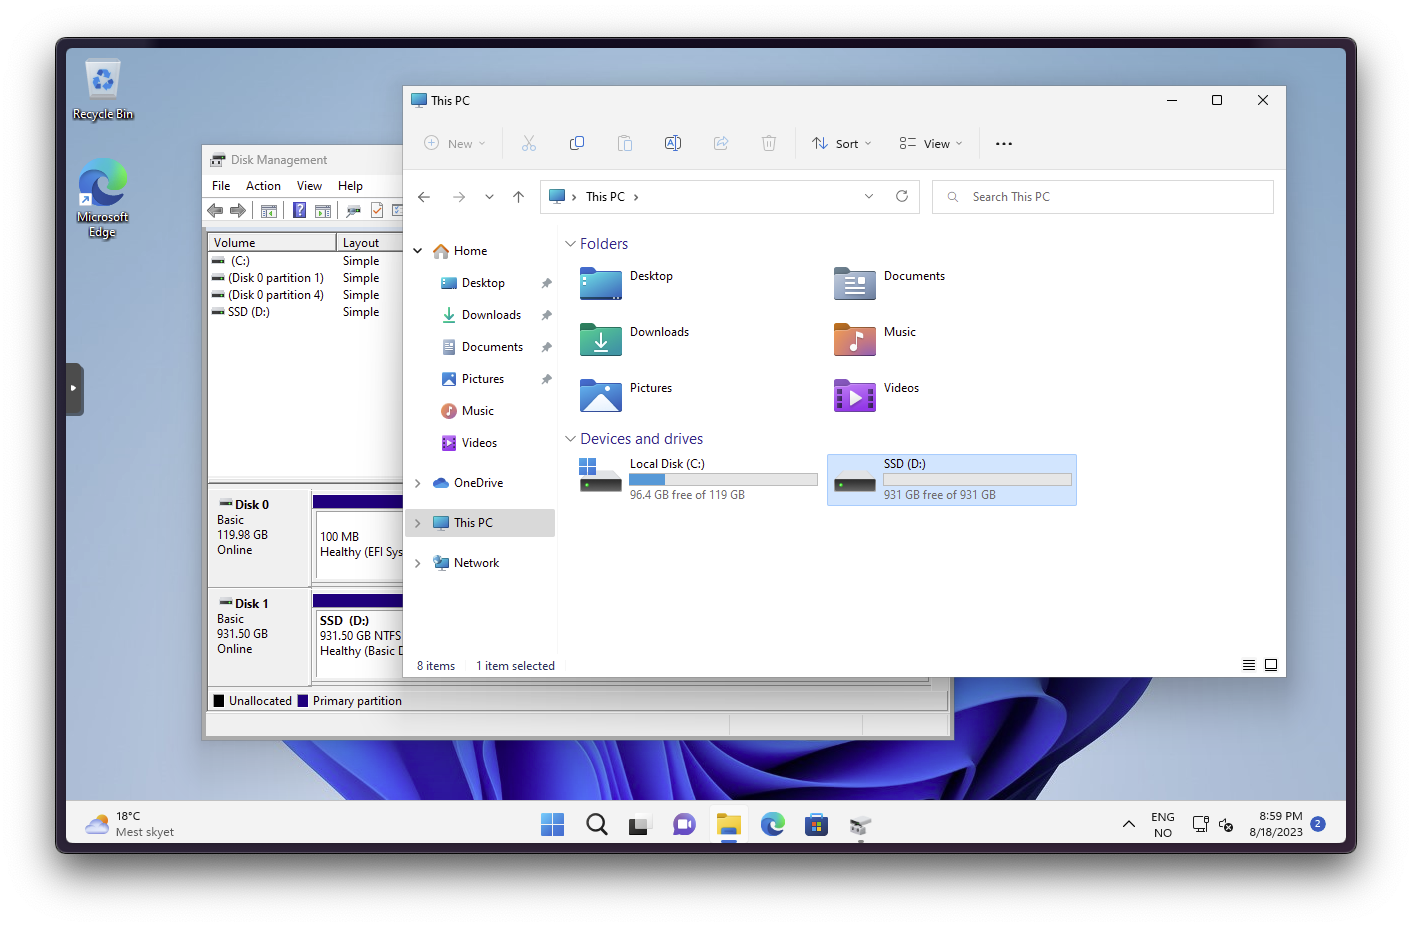
Congratulations on your successful Disk Passthrough!
Unlinking a Disk from a VM
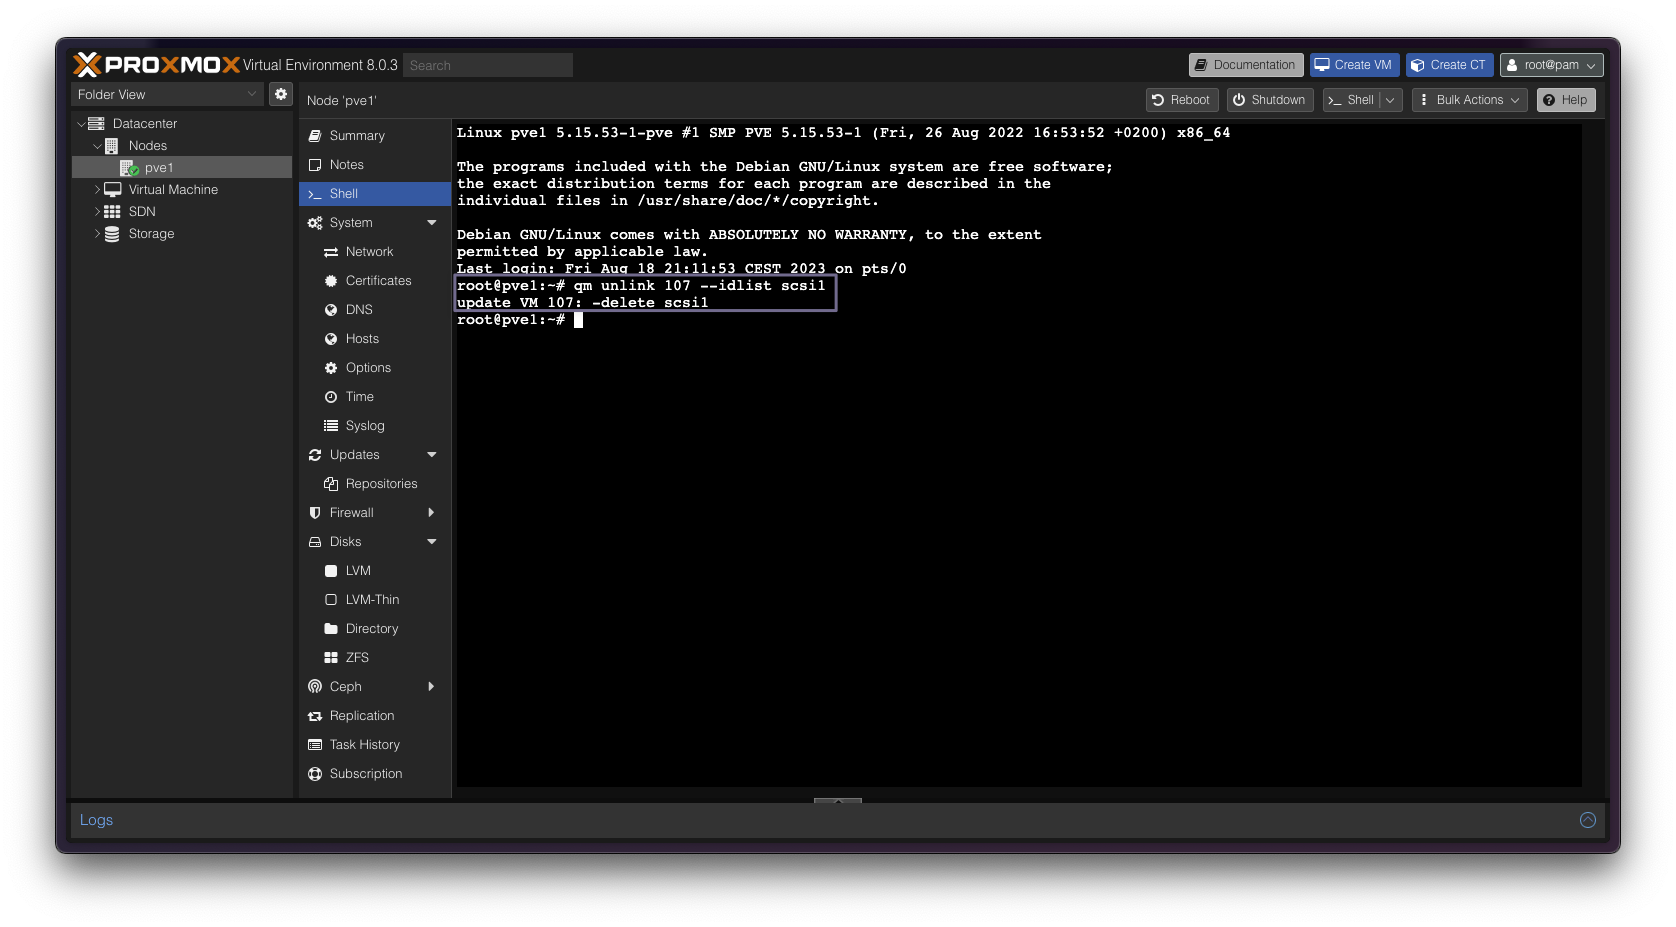
qm unlink {vmid} --idlist {disk-type}{number}