Prerequisites
You’ll need the following;
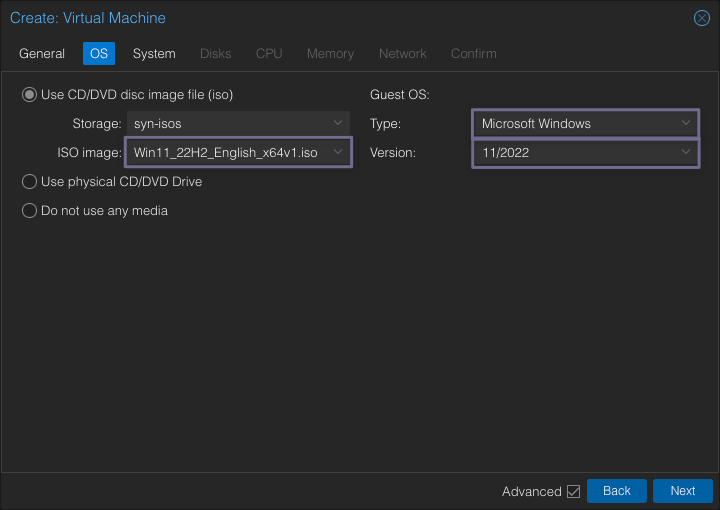
- An ISO file of Windows 11, or any other Windows version you’d want. I’m not going to provide any, you should be able to download it from the Microsoft servers.
- An ISO of the VirtIO drivers and tools. You can download the latest stable release here. If for any reason it’s not working for you, have a look at this page to browse for whichever version you need.
If you didn’t know, VirtIO drivers are like super cool for KVM. They let you get direct access to all the peripherals and devices of the guest VM. Emulated device drivers are like, way too slow man.
Once you’ve fetched the ISOs, upload them to your Proxmox node or your main storage for ISOs.
Creating the VM
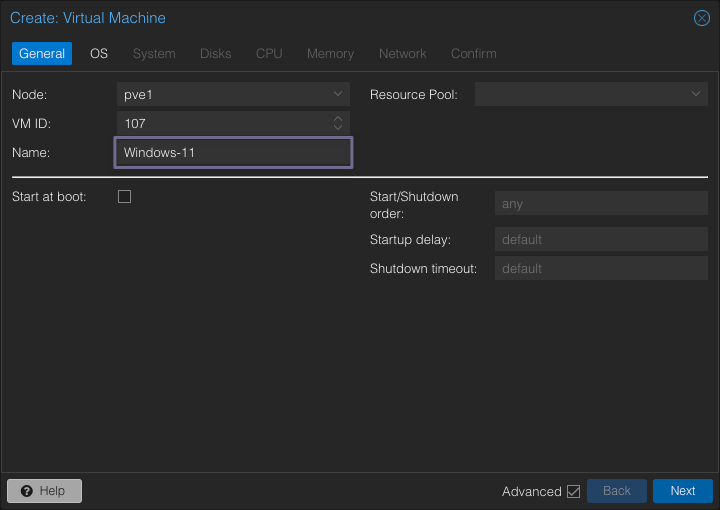

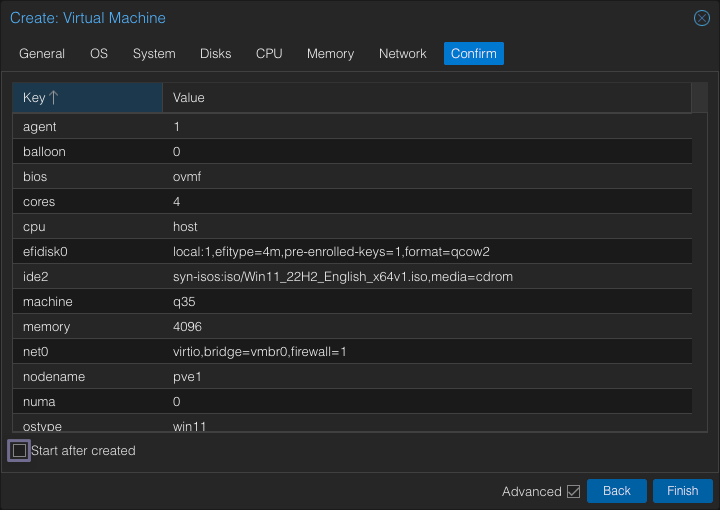
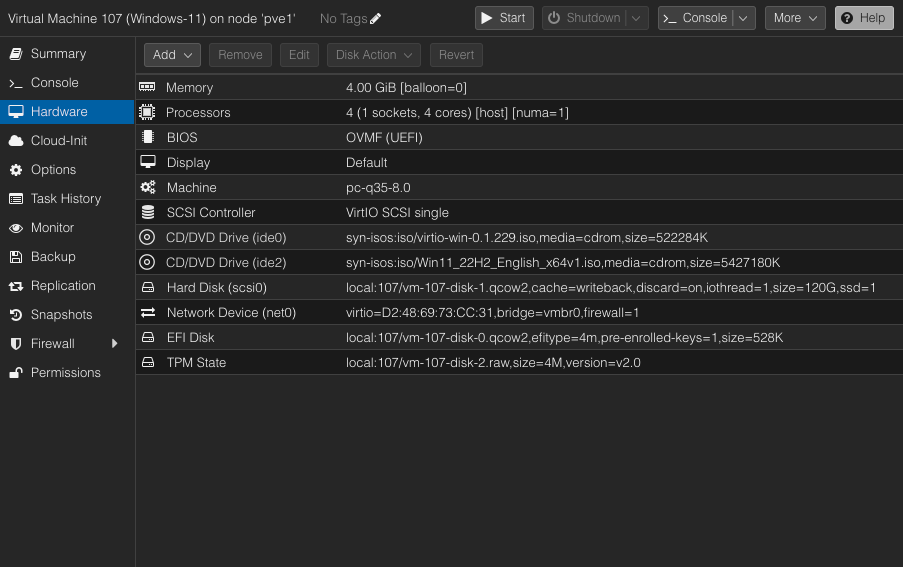
Details
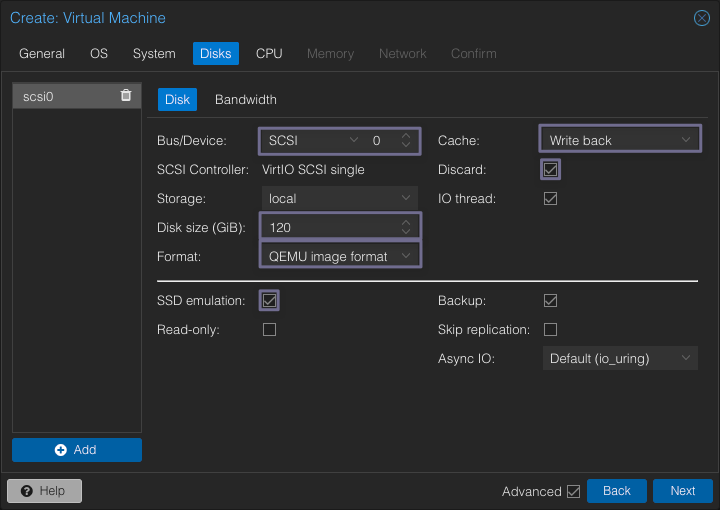
- The SCSI controller is set to VirtIO SCSI single, and the Qemu Agent option is checked.
- Under firmware options, BIOS is set to OVMF (UEFI), add EFI disk is checked, EFI storage is selected, and the EFI storage format is Qemu Image Format (qcow2).
- Check the Add TPM option, and select TPM storage and TPM version 2.0.
- If you need PCIe support for GPU passthrough on your Windows VM, make sure the machine field is set to q35 instead of i440fx.
- You can also change the graphics card from Default to SPICE (simple protocol for independent computing environments) for the best desktop experience.Tip: Proxmox uses raw disk format for the TPM disk, since the TPM emulator software does not support the qemu image (qcow2) format. If you set local directory-based storage for the TPM disk, you will not be able to create live snapshots of the VM, and you will see a message stating, “The current guest configuration does not support taking new snapshots”.
To get around this problem, you should choose a storage for the TPM disk that allows snapshots of raw disk formats. A few examples of such storage types are ZFS, BTRFS, Ceph, and LVM-thin.
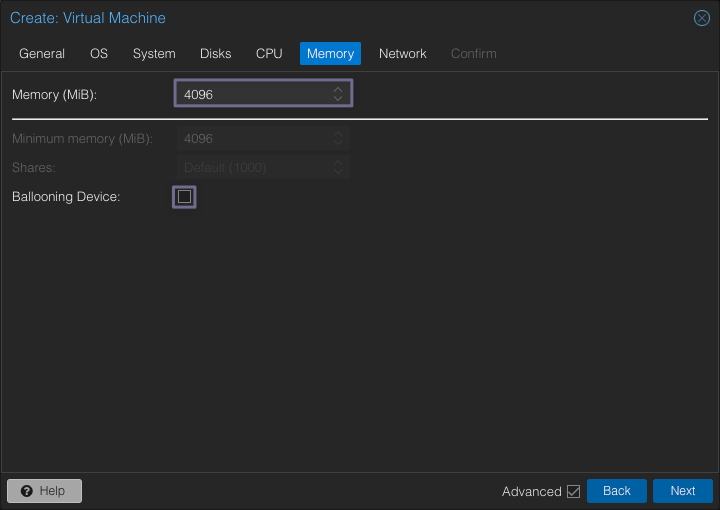
That assures that the VM has all the allocated Memory at all times.
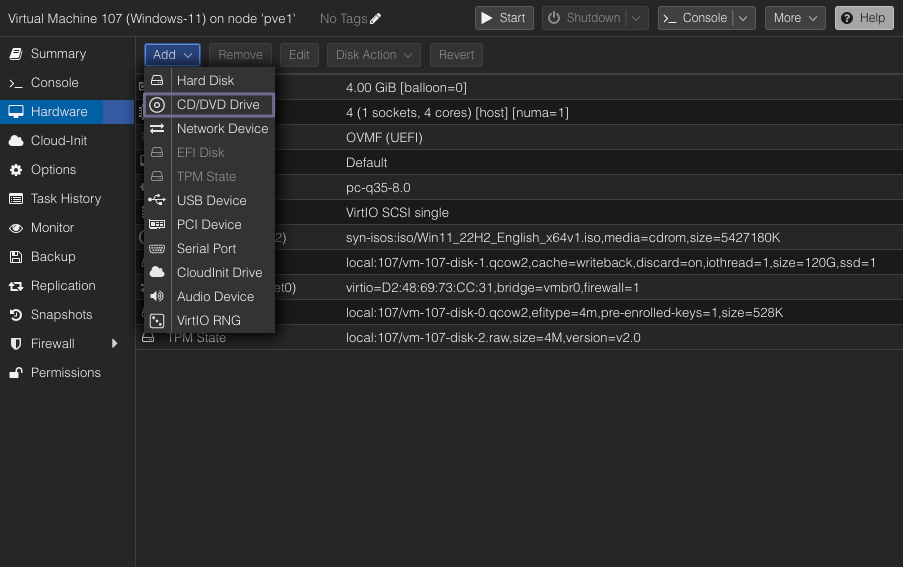
In the Hardware tab, and then click Add to open a dropdown menu. Next, select the CD/DVD Drive option as shown.
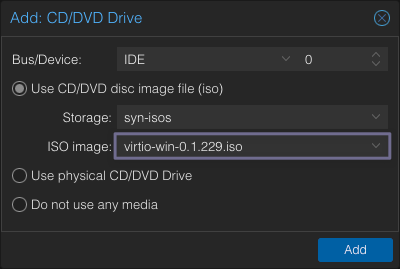
Select the VirtIO ISO you downloaded earlier, and click Add.
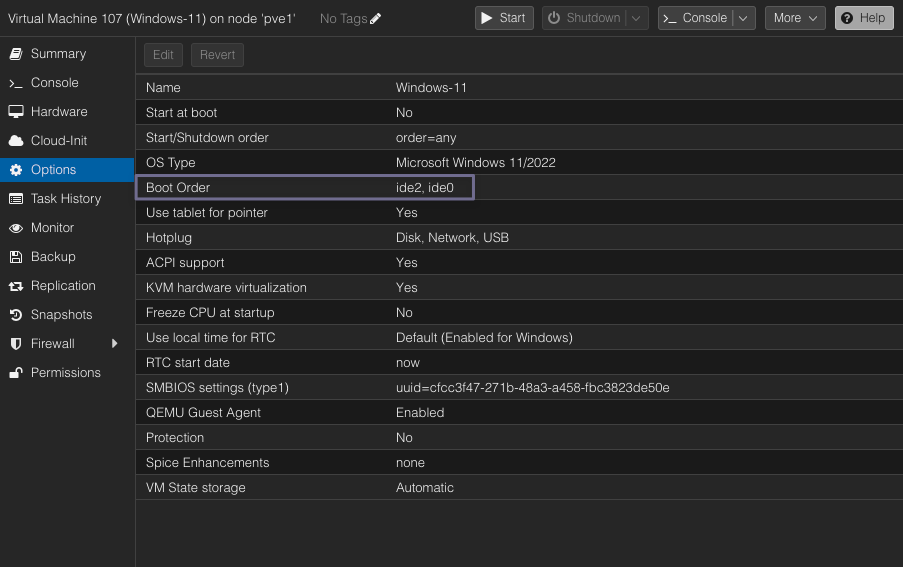
Before we boot our VM, we need to make some adjustments to the Boot Order of the VM. Head into Options and hit Edit on the Boot Order.
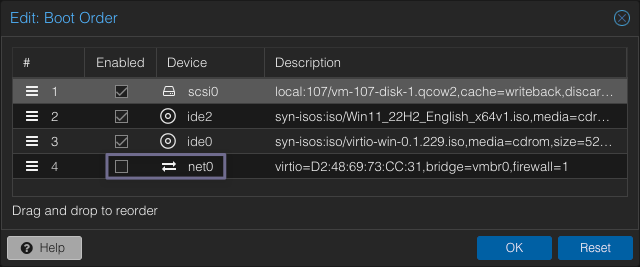
Make sure to untick net0 and make sure the list corresponds as shown.
Installing Windows
Now you can fire up your Windows VM, hit the told key on-screen to initiate the Windows setup.
Just follow through the installer until you end up as shown on the next step.
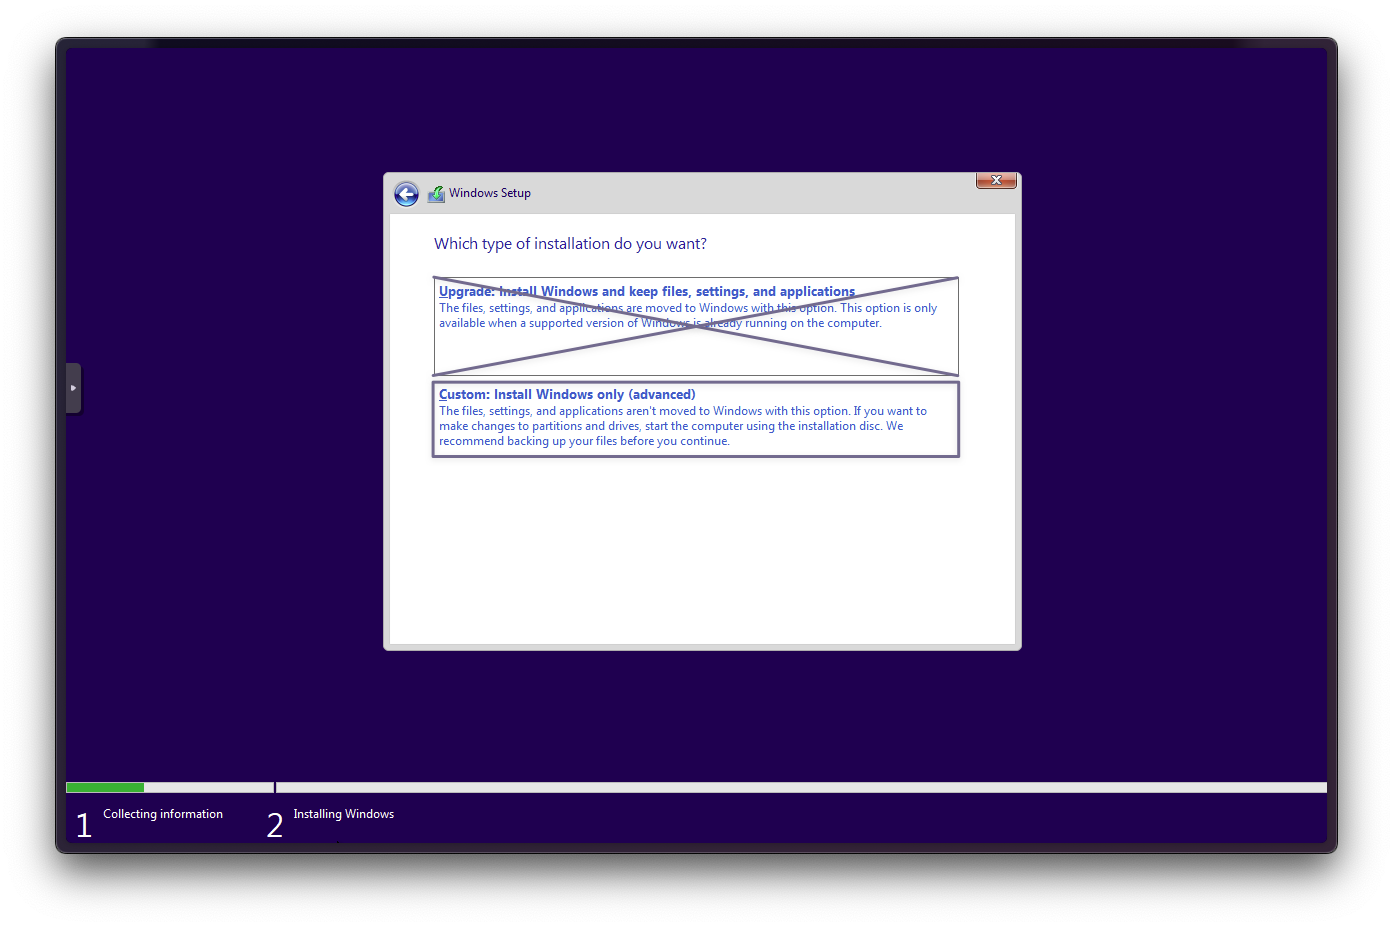
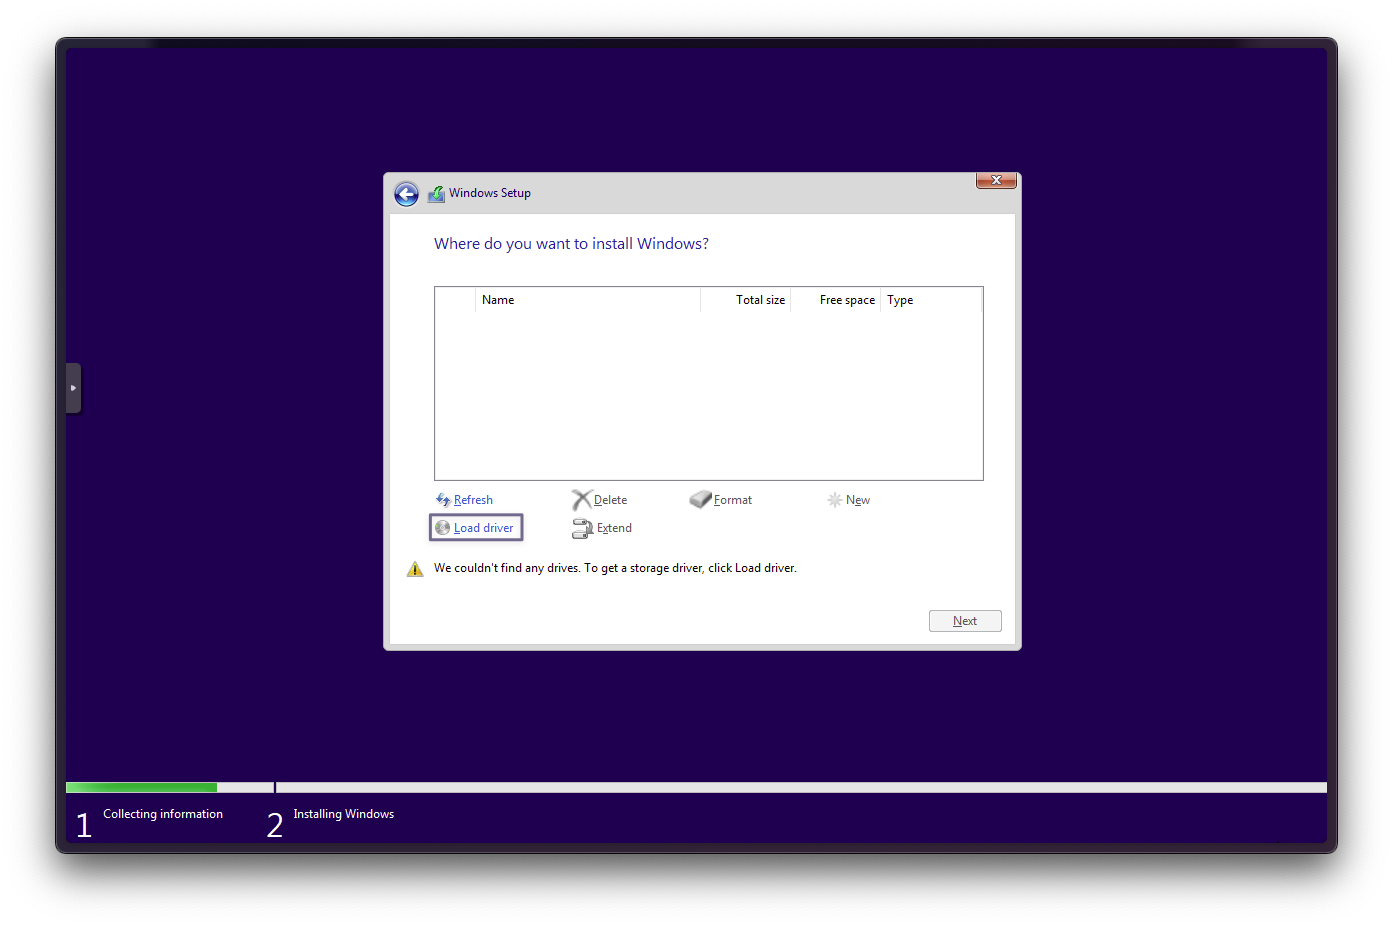
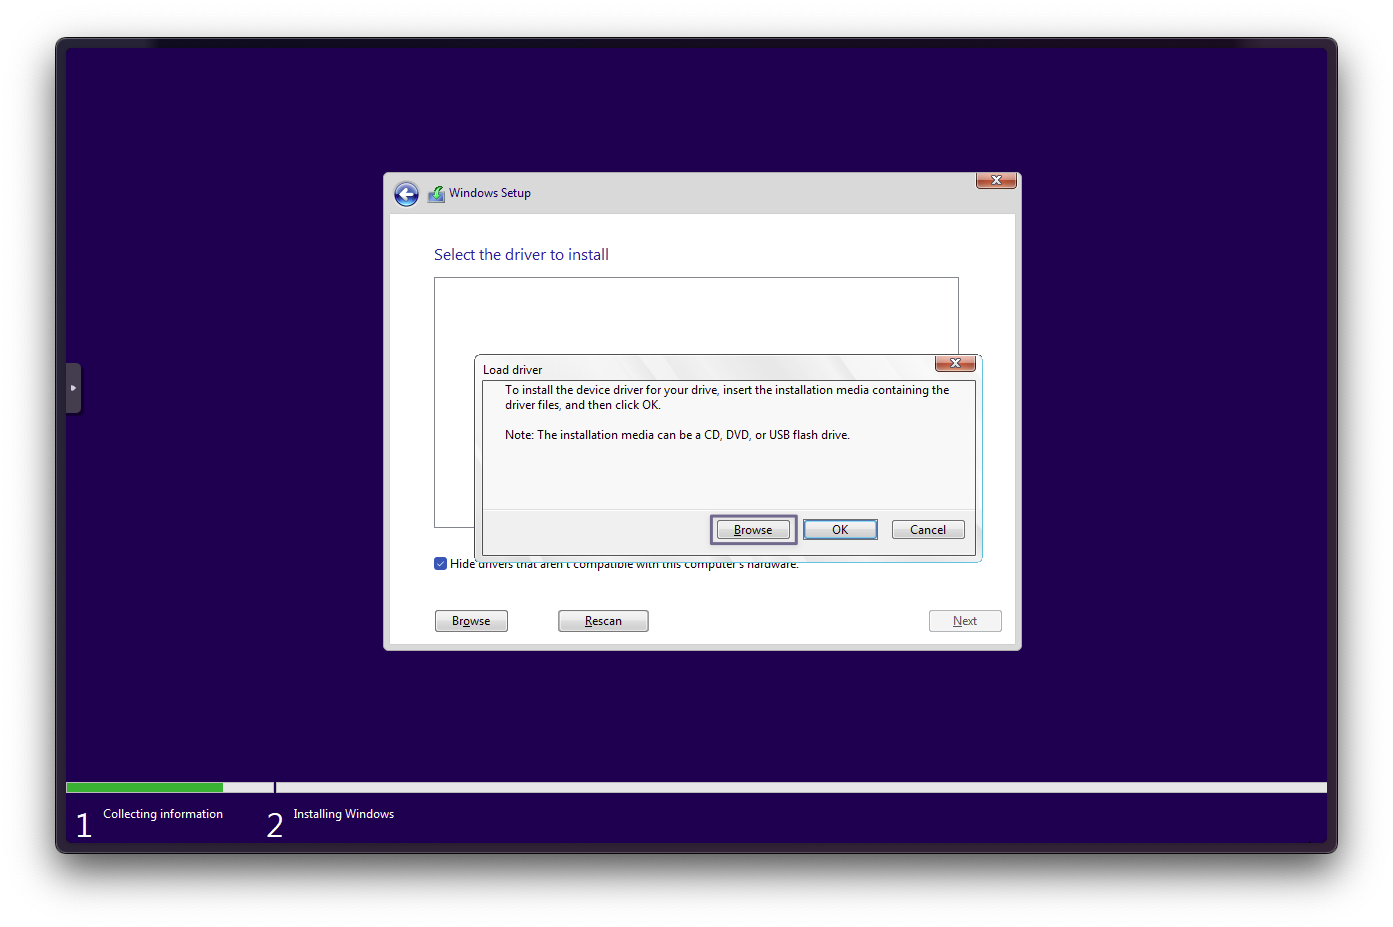
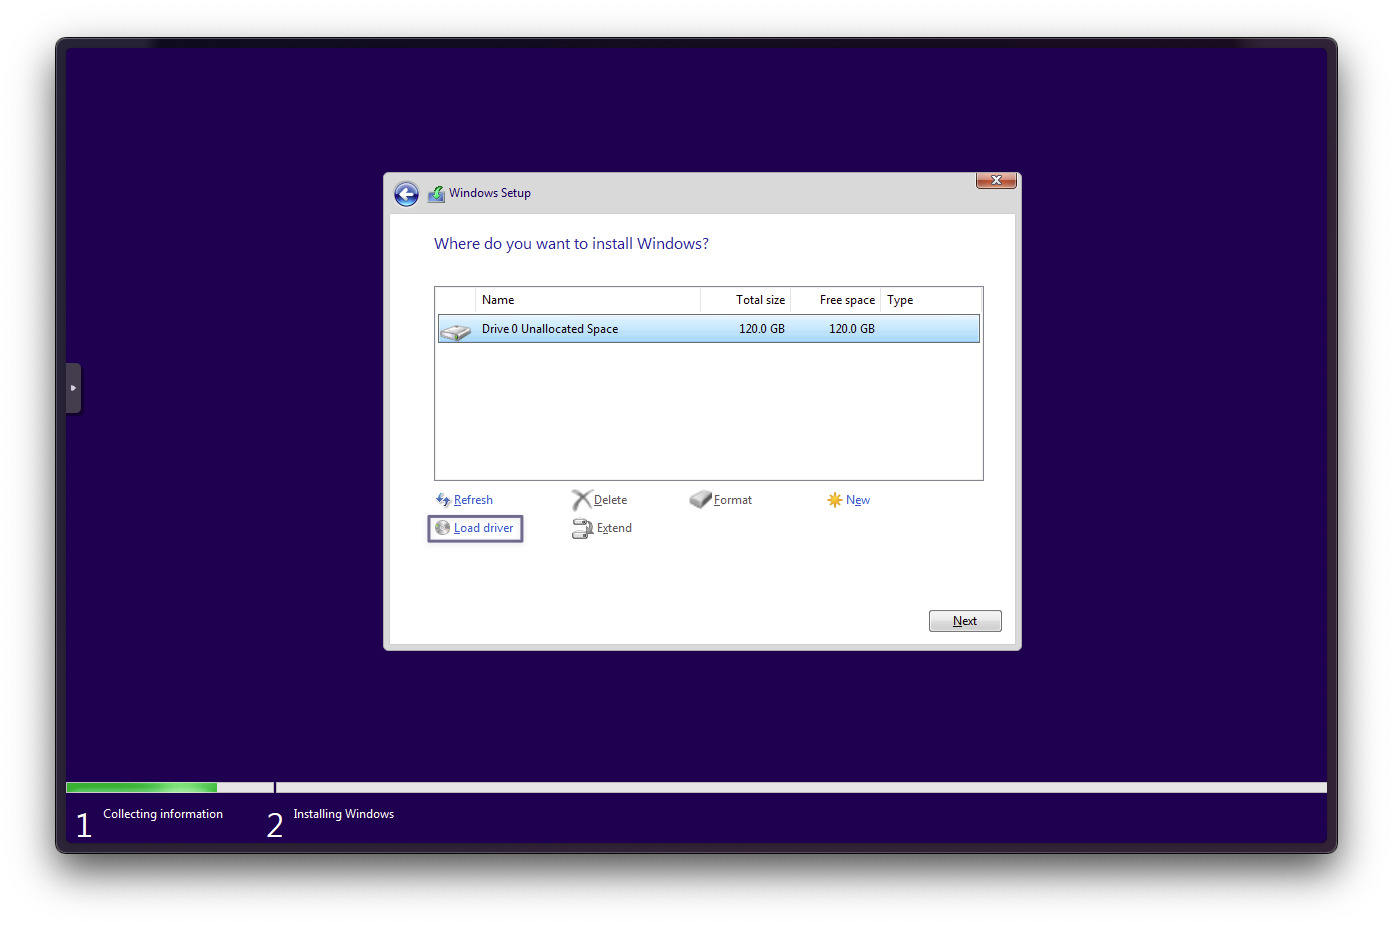
The subsequent step is noteworthy. It is evident that the absence of a Windows installation disk is due to the VirtIO SCSI controller being chosen for the VM disk, rendering the disk undetectable by Windows. Select the Load driver option, as depicted in the screenshot below.
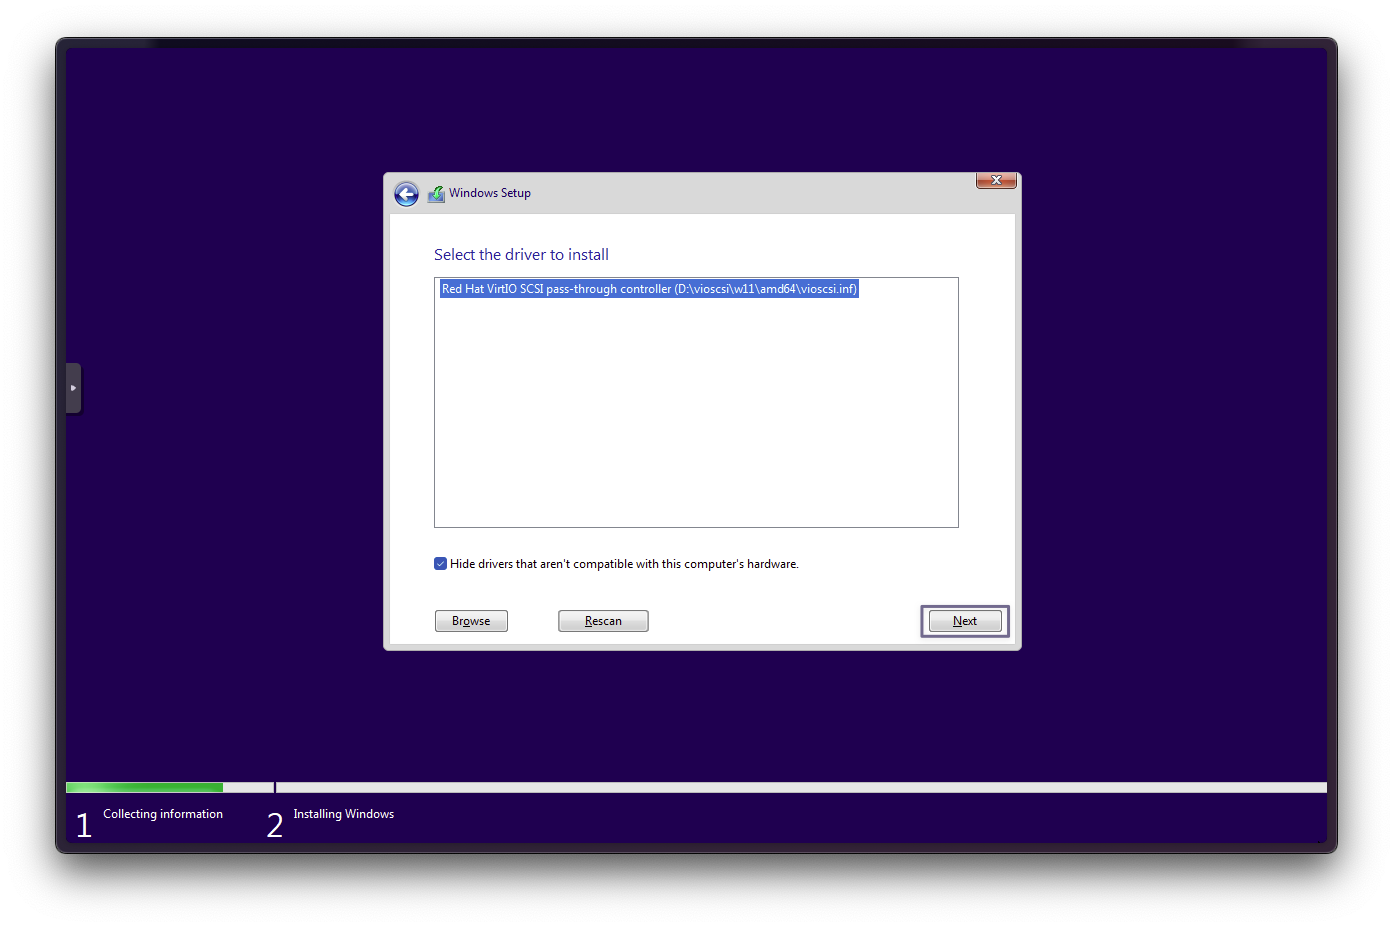
Please note that the disk has been detected. To specify the VirtIO network adapter driver, please click on Load driver once again and select the VMNet folder.
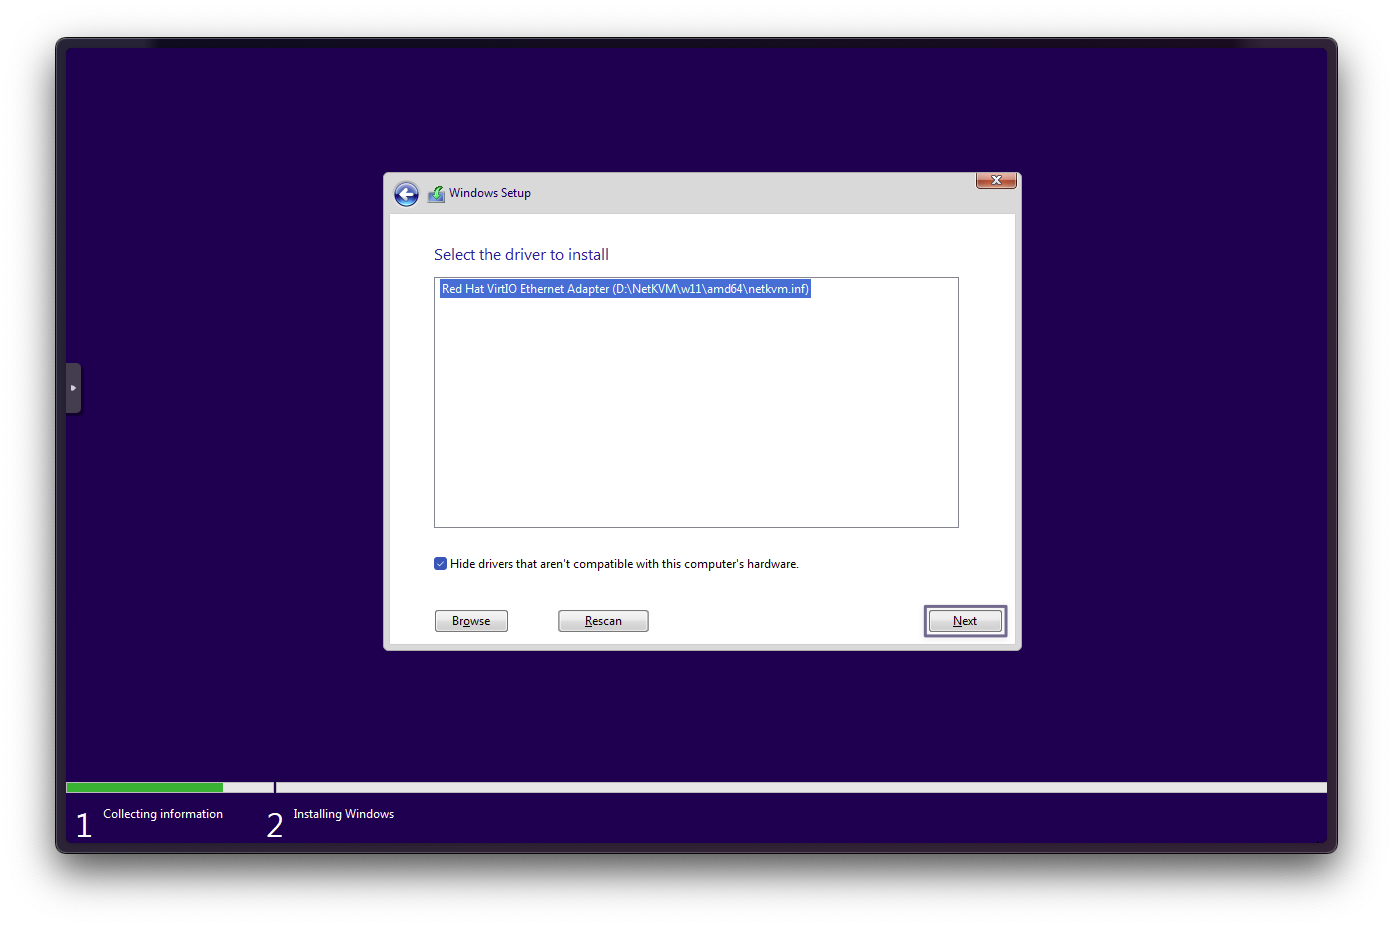
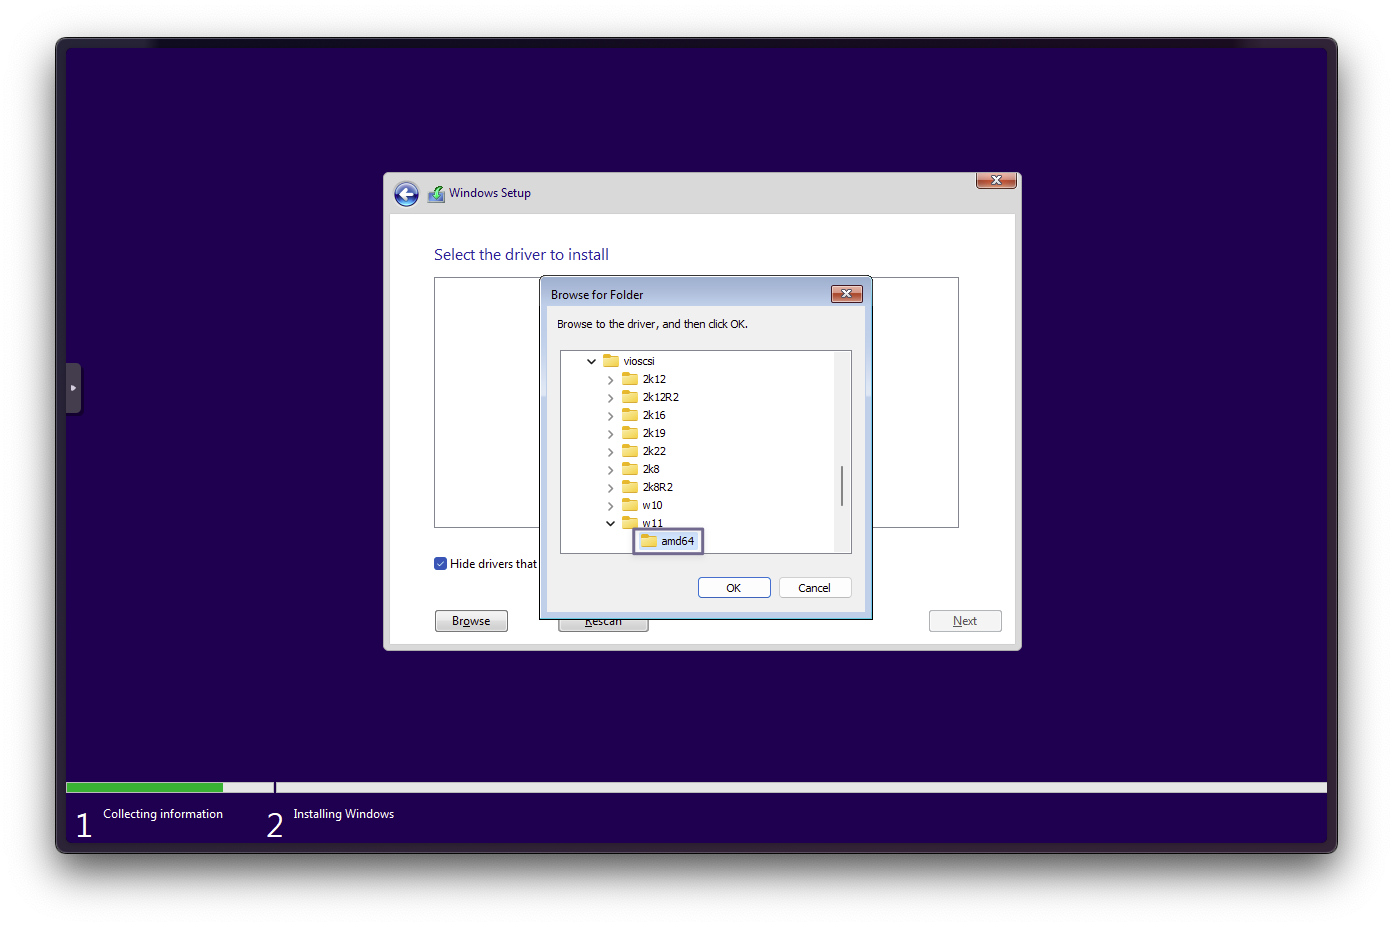
Again, do pick the correct folder for your choice of Windows version. In this case its; D:\NetKVM\w11\amd64.
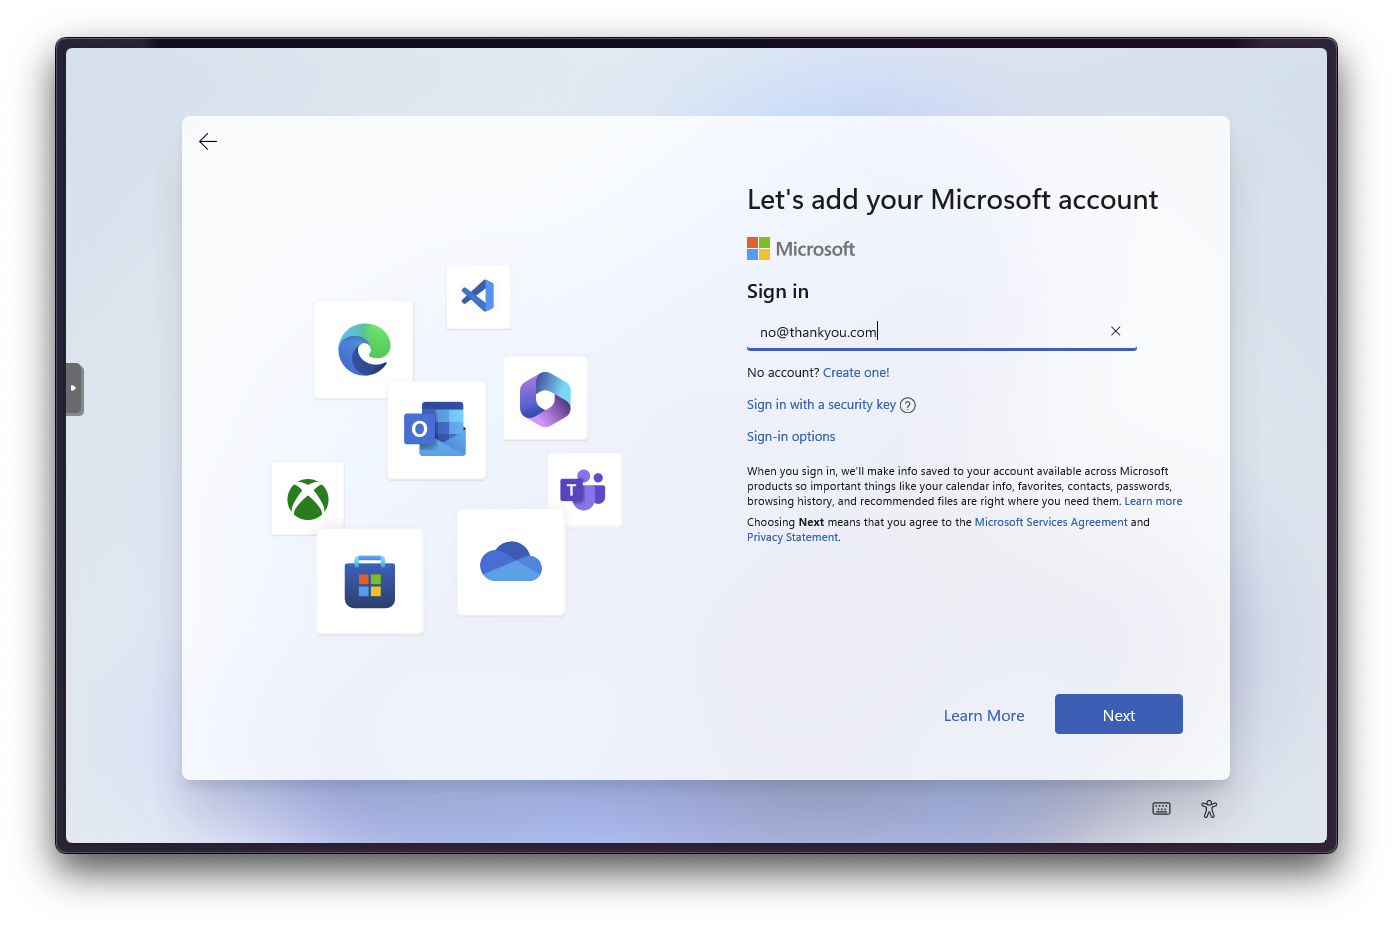
You can also skip this easily;
- Type in; no@thankyou.com for the Email.
- For the password, just type anything.
What will happen, is that an error will show, and you can just hit skip and continue on with creating your Local Account.
Post-Installation
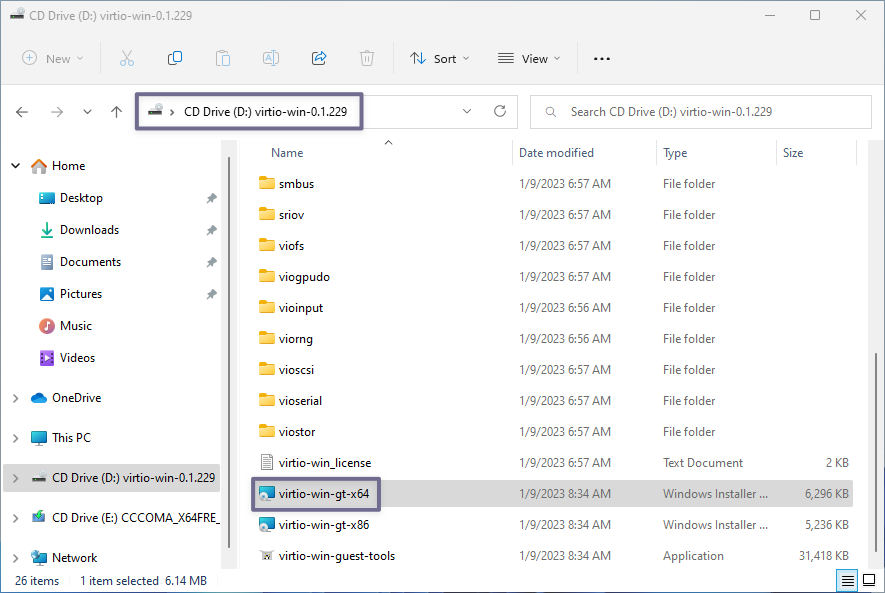
Upon completion of the Windows installation, open File Explorer and navigate to the drive where the VirtIO ISO file is mounted. Locate and execute the virtio-win-gt-x64.msi (or virtio-win-gt-x86.msi) file, which may have a different name for alternative Windows versions.
The installation process will include all necessary VirtIO drivers for your Windows VM, along with the ballooning service if you chose to utilize that feature.
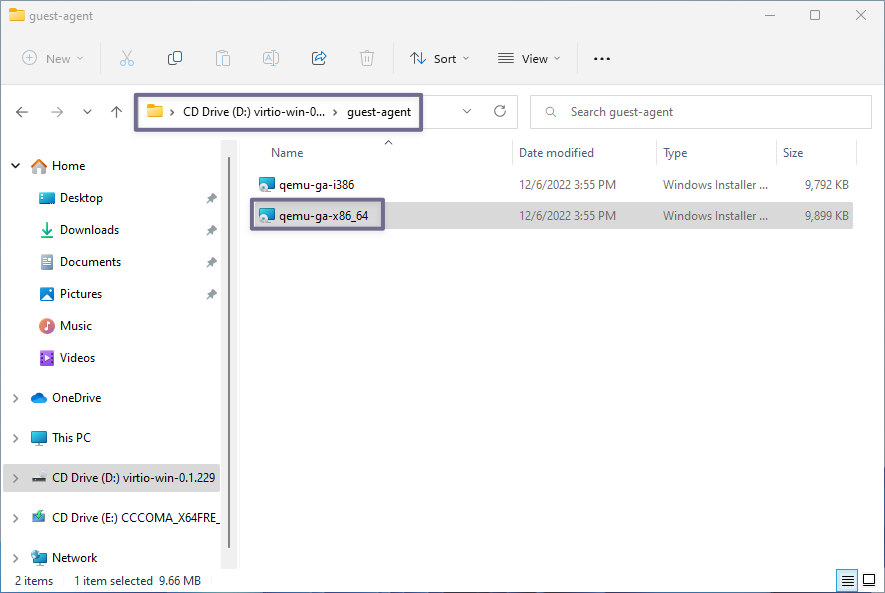
After the driver installation, access the guest-agent directory and execute the qemu-ga-x86_64.msi file to deploy the qemu guest agent. Although not mandatory, it facilitates data exchange between the Proxmox node and guest OS, and enables remote command execution.
Completion of the Windows VM Guide
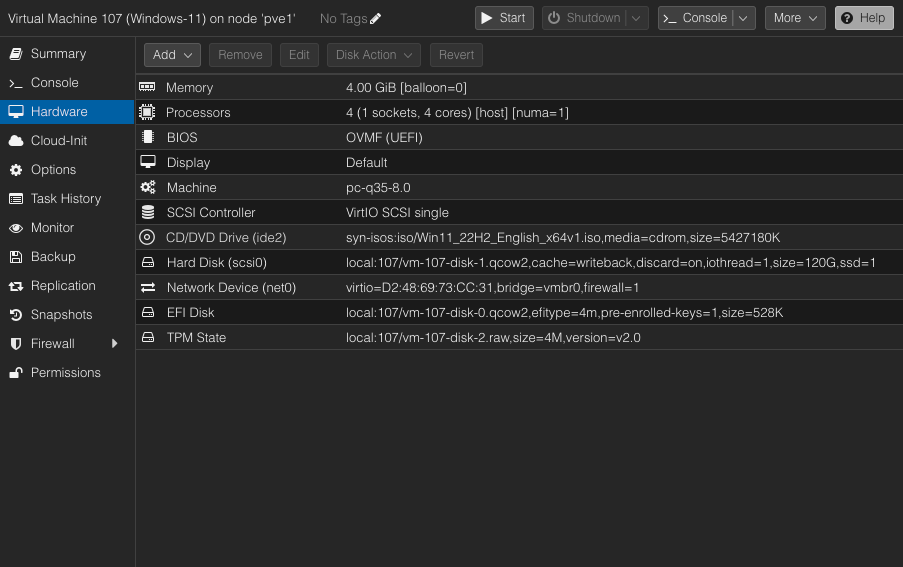
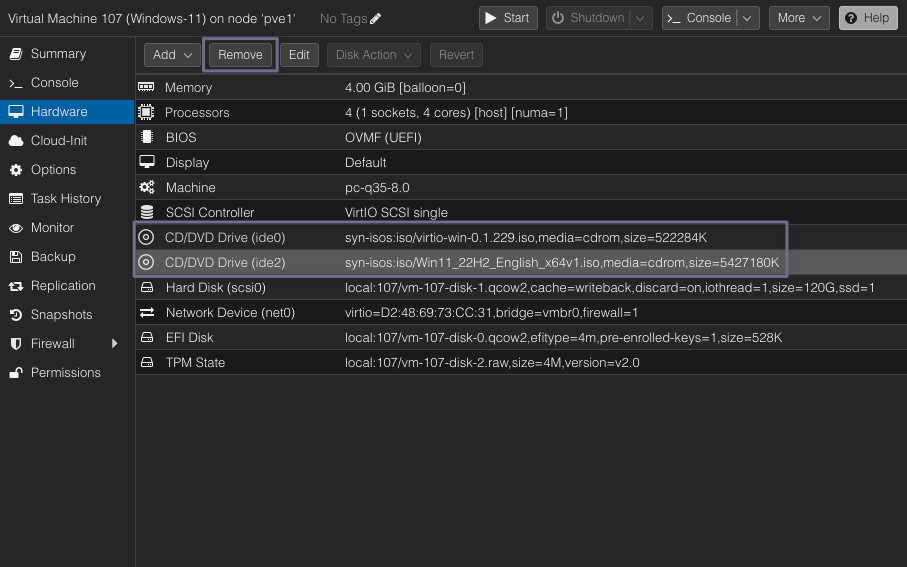
Once drivers and Guest-Agent is all set and done, go ahead and shut down your Windows VM.
Head back into the Hardware tab;
Congratulations on your successfully installed Windows VM!
Want to get more out of your VM?
Check out my PCI Passthrough Guide!